Are you interested in running your own Base nodes? If so, you’ve come to the right place! In this guide, we’ll introduce you to Web3’s leading node provider, Moralis. With our intuitive user interface, you can run an RPC node on Base with just a few clicks. Here’s a brief three-step overview of the process:
Step 1: Register a free account with Moralis.Step 2: Log in, go to the “Nodes” tab, click the “+ Create Node” button, and set up your Base node:
Step 3: Copy and integrate one of your node URLs into your Base project:
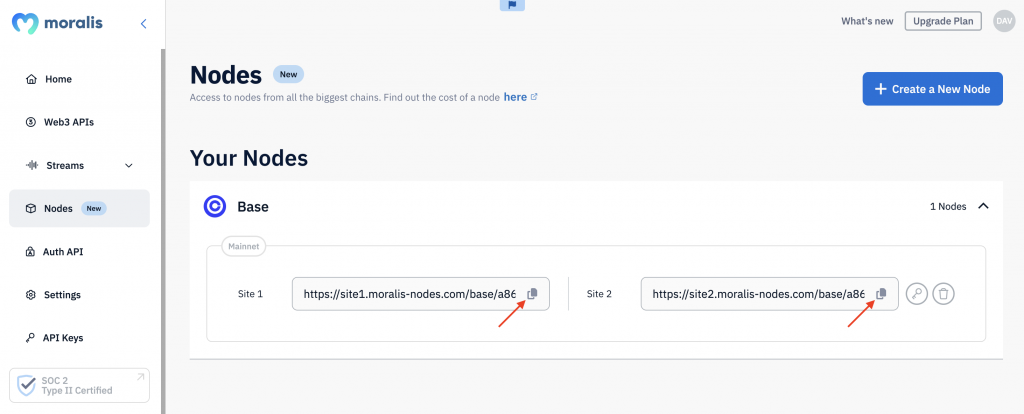
That’s it! Running Base nodes is simple with Moralis. For a more detailed explanation, please check out our RPC nodes documentation or continue reading this article!
Ready to set up your own Base nodes? Sign up with Moralis today! You can create an account for free and gain immediate access to our premier node service.
Overview
Setting up a Base RPC node from scratch can be a time-consuming, resource-intensive, and costly task as it requires a complex infrastructure, significant bandwidth, and substantial hardware. Moreover, nodes are chain-specific, meaning you’ll need to set up and maintain one for each network you plan to interact with. This becomes particularly cumbersome if you’re building cross-chain decentralized applications (dapps). Fortunately, you can bypass these challenges by using the industry’s leading node provider, Moralis!

At Moralis, we streamline the process of running blockchain nodes by managing all the underlying complexities for you. As such, when leveraging Moralis, you can effortlessly set up Base nodes with just a few clicks. Join us in this comprehensive guide to learn exactly how it works. Let’s dive in!
What is Base?
Base, launched in 2023, is Coinbase’s Ethereum layer-2 (L2) solution. This network is designed to offer enhanced scalability, interoperability, and performance while reducing costs and increasing throughput. As a result, it offers a more scalable and cost-effective alternative to Ethereum for both users and developers!
So, what are the benefits of building dapps on Base?
High Throughput: Base leverages optimistic roll-up technology to enhance throughput. By bundling transactions together and submitting them in bulk to Ethereum for validation, Base can process transactions much faster than the Ethereum mainnet. Ease of Use: Base offers full EVM equivalence, making it straightforward for developers to migrate existing Ethereum contracts and dapps to the network. Additionally, its compatibility with Ethereum tools, programming languages, and frameworks ensures a seamless developer experience. Low Fees: By consolidating multiple off-chain operations into a single Ethereum transaction, Base significantly reduces fees, making it a more economically friendly platform compared to Ethereum.
This overview highlights the key advantages of Base. Now, let’s delve into the specifics of Base nodes!
What are Base Nodes?
Put simply, Base nodes are computers and other devices that participate in the blockchain network by performing multiple crucial tasks. A couple of prominent examples include transaction validation and data storage. The Base blockchain comprises many nodes that together contribute to the security and stability of the network!

So, what are Base nodes used for?
Data Storage: Base nodes store transaction and smart contract data. They continuously update with new transactions, maintaining an accurate and current record of all blockchain activities. Transaction Validation: Base nodes validate transactions and propagate new blocks to the blockchain. This process is critical for keeping the network secure and efficiently operational. Web3 Development: Serving as the gateway to the Base blockchain, nodes enable the reading and writing of blockchain data. This functionality is vital for Web3 development, providing developers with the means to interact seamlessly with the network.
That gives you an overview of Base nodes. In the next section, we’ll introduce you to Moralis, which is the easiest way to set up and run your own RPC node on Base!
Introducing Moralis – The Easiest Way to Run Base Nodes
The easiest way to run Base nodes is to leverage Moralis – the industry’s premier node provider. With our intuitive point-and-click user interface, you can now set up nodes for 20+ blockchain networks without breaking a sweat!

But why choose our nodes?
Reliability: At Moralis, reliability is paramount. Serving over 50 million end users, we ensure a 99.9% uptime, guaranteeing the dependability of our nodes. Speed: Moralis nodes set the benchmark for speed, delivering response times as low as 70 ms. Get the data you need instantly, ensuring seamless performance without any delay. Security: Leverage Web3’s only SOC 2 Type 2 certified provider to protect your company’s data with confidence.
This overview highlights the key advantages of Moralis’ node service. Now, let’s walk you through the process of setting up your own Base nodes!
Tutorial: How to Run Base Nodes
To get started, you will first need to create a Moralis account. As such, if you haven’t already, click the “Start for Free” button at the top right corner to sign up for a free account:
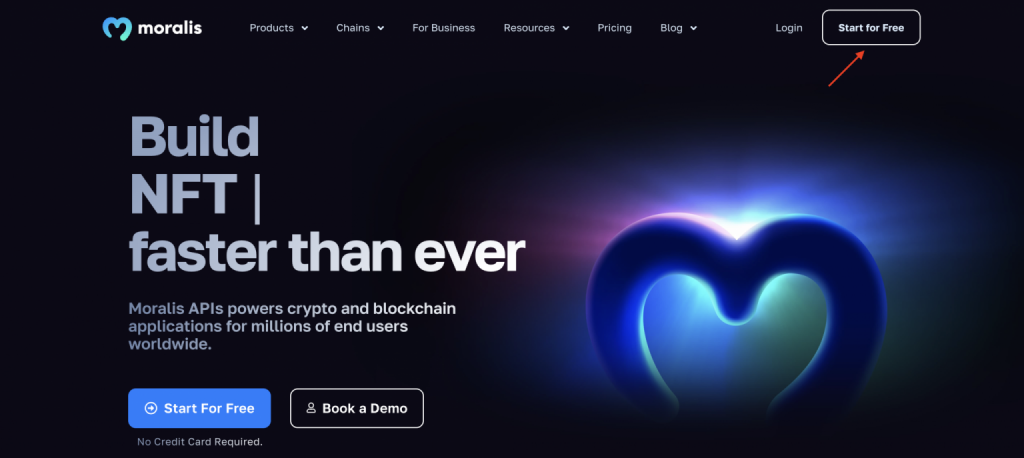
Once you have an account, follow these steps:
Step 1: Login and go to the “Nodes” tab:
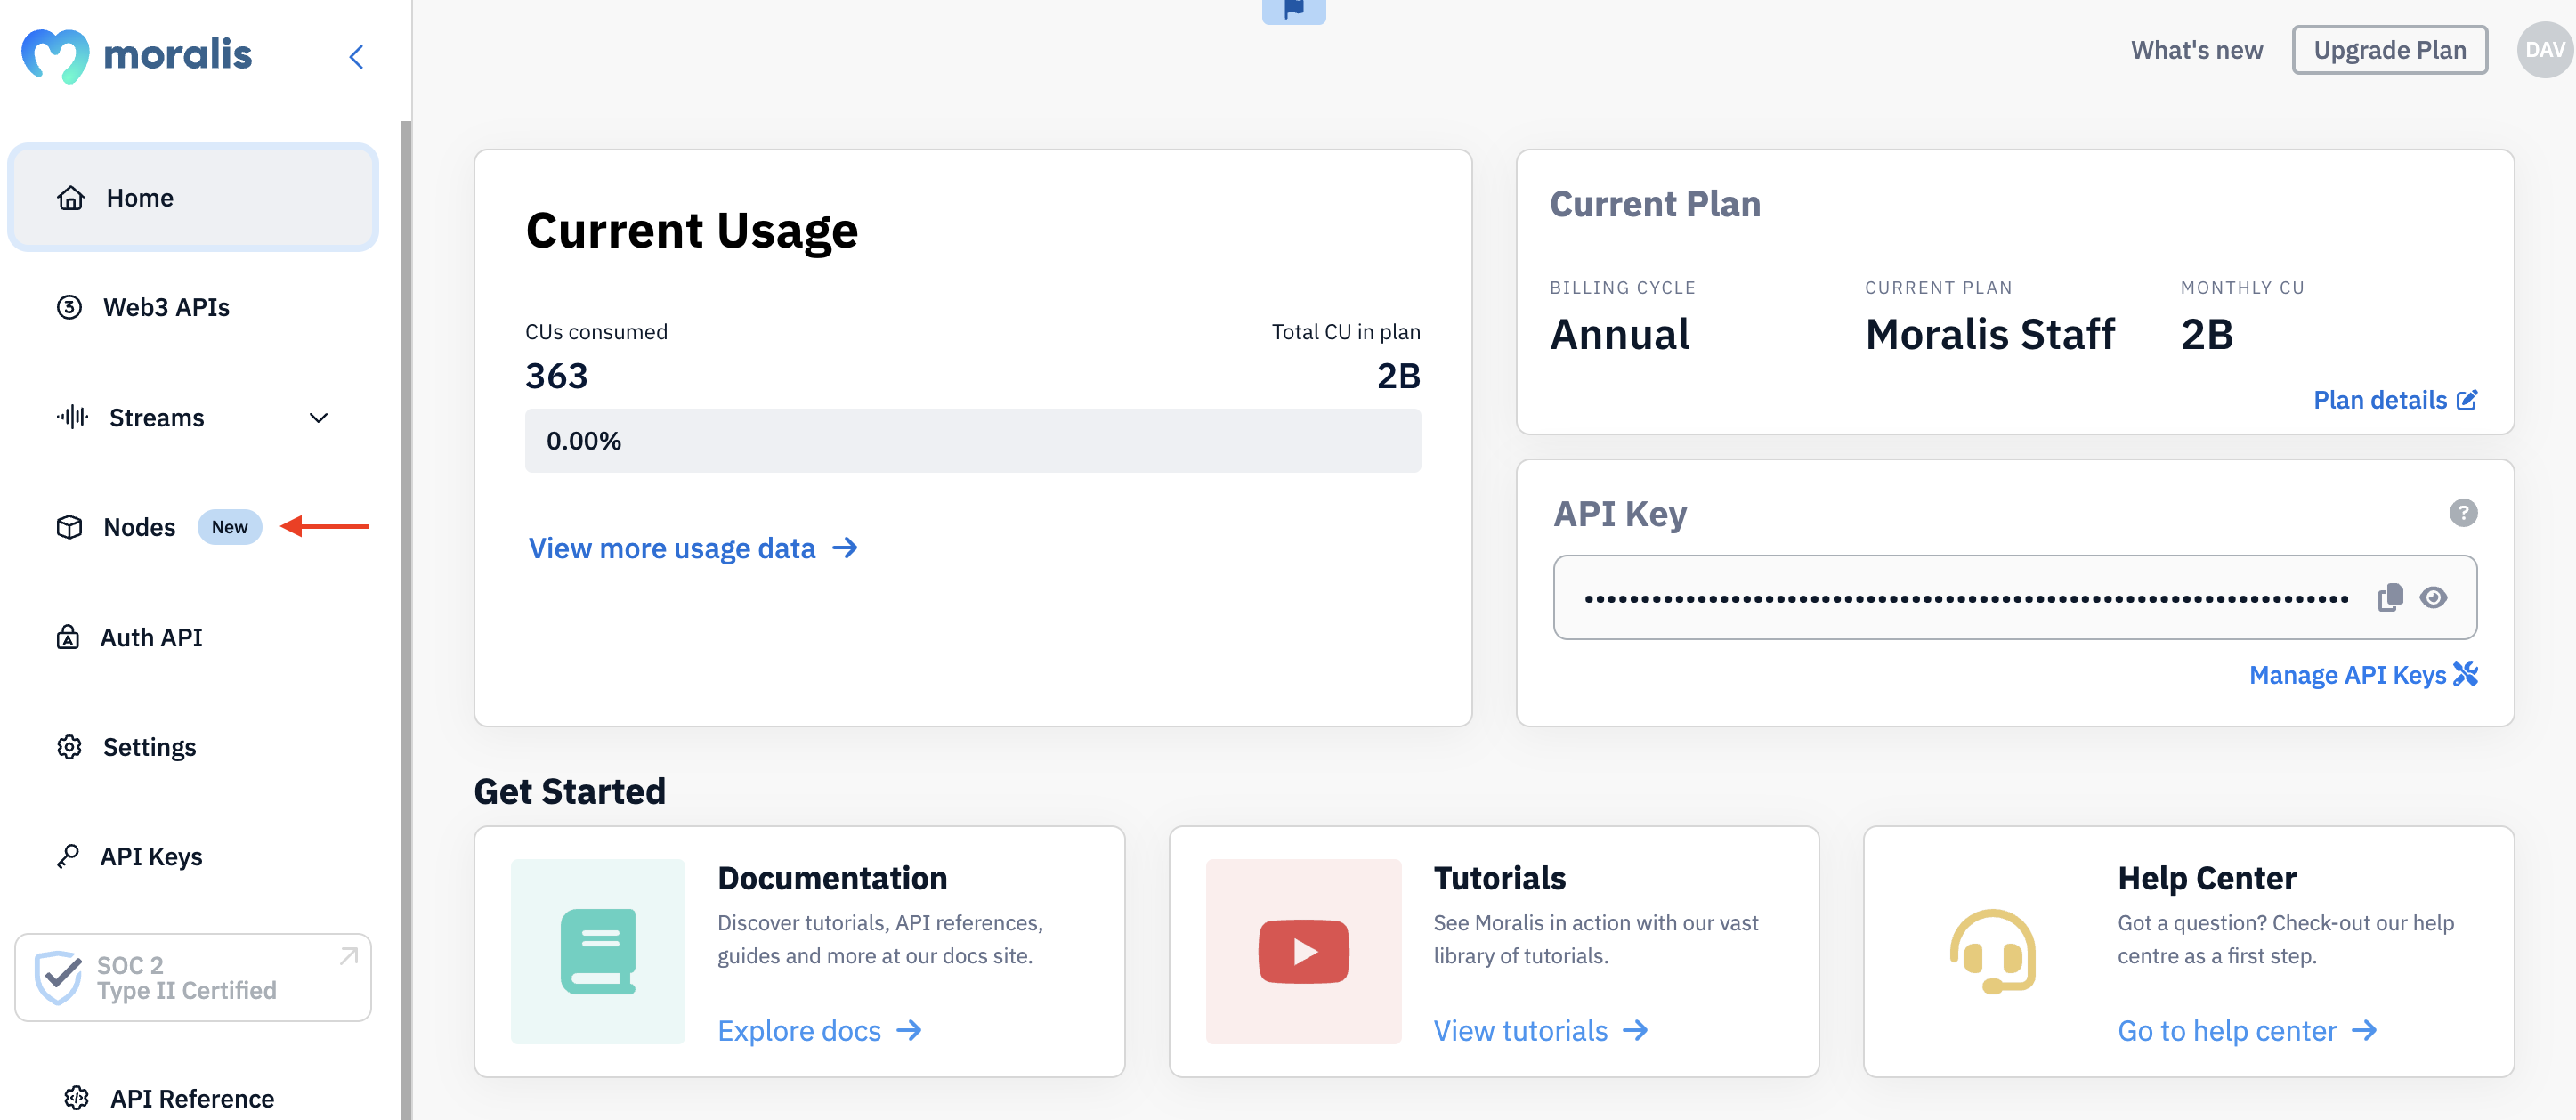
Step 2: Click on the “+ Create Node” button:
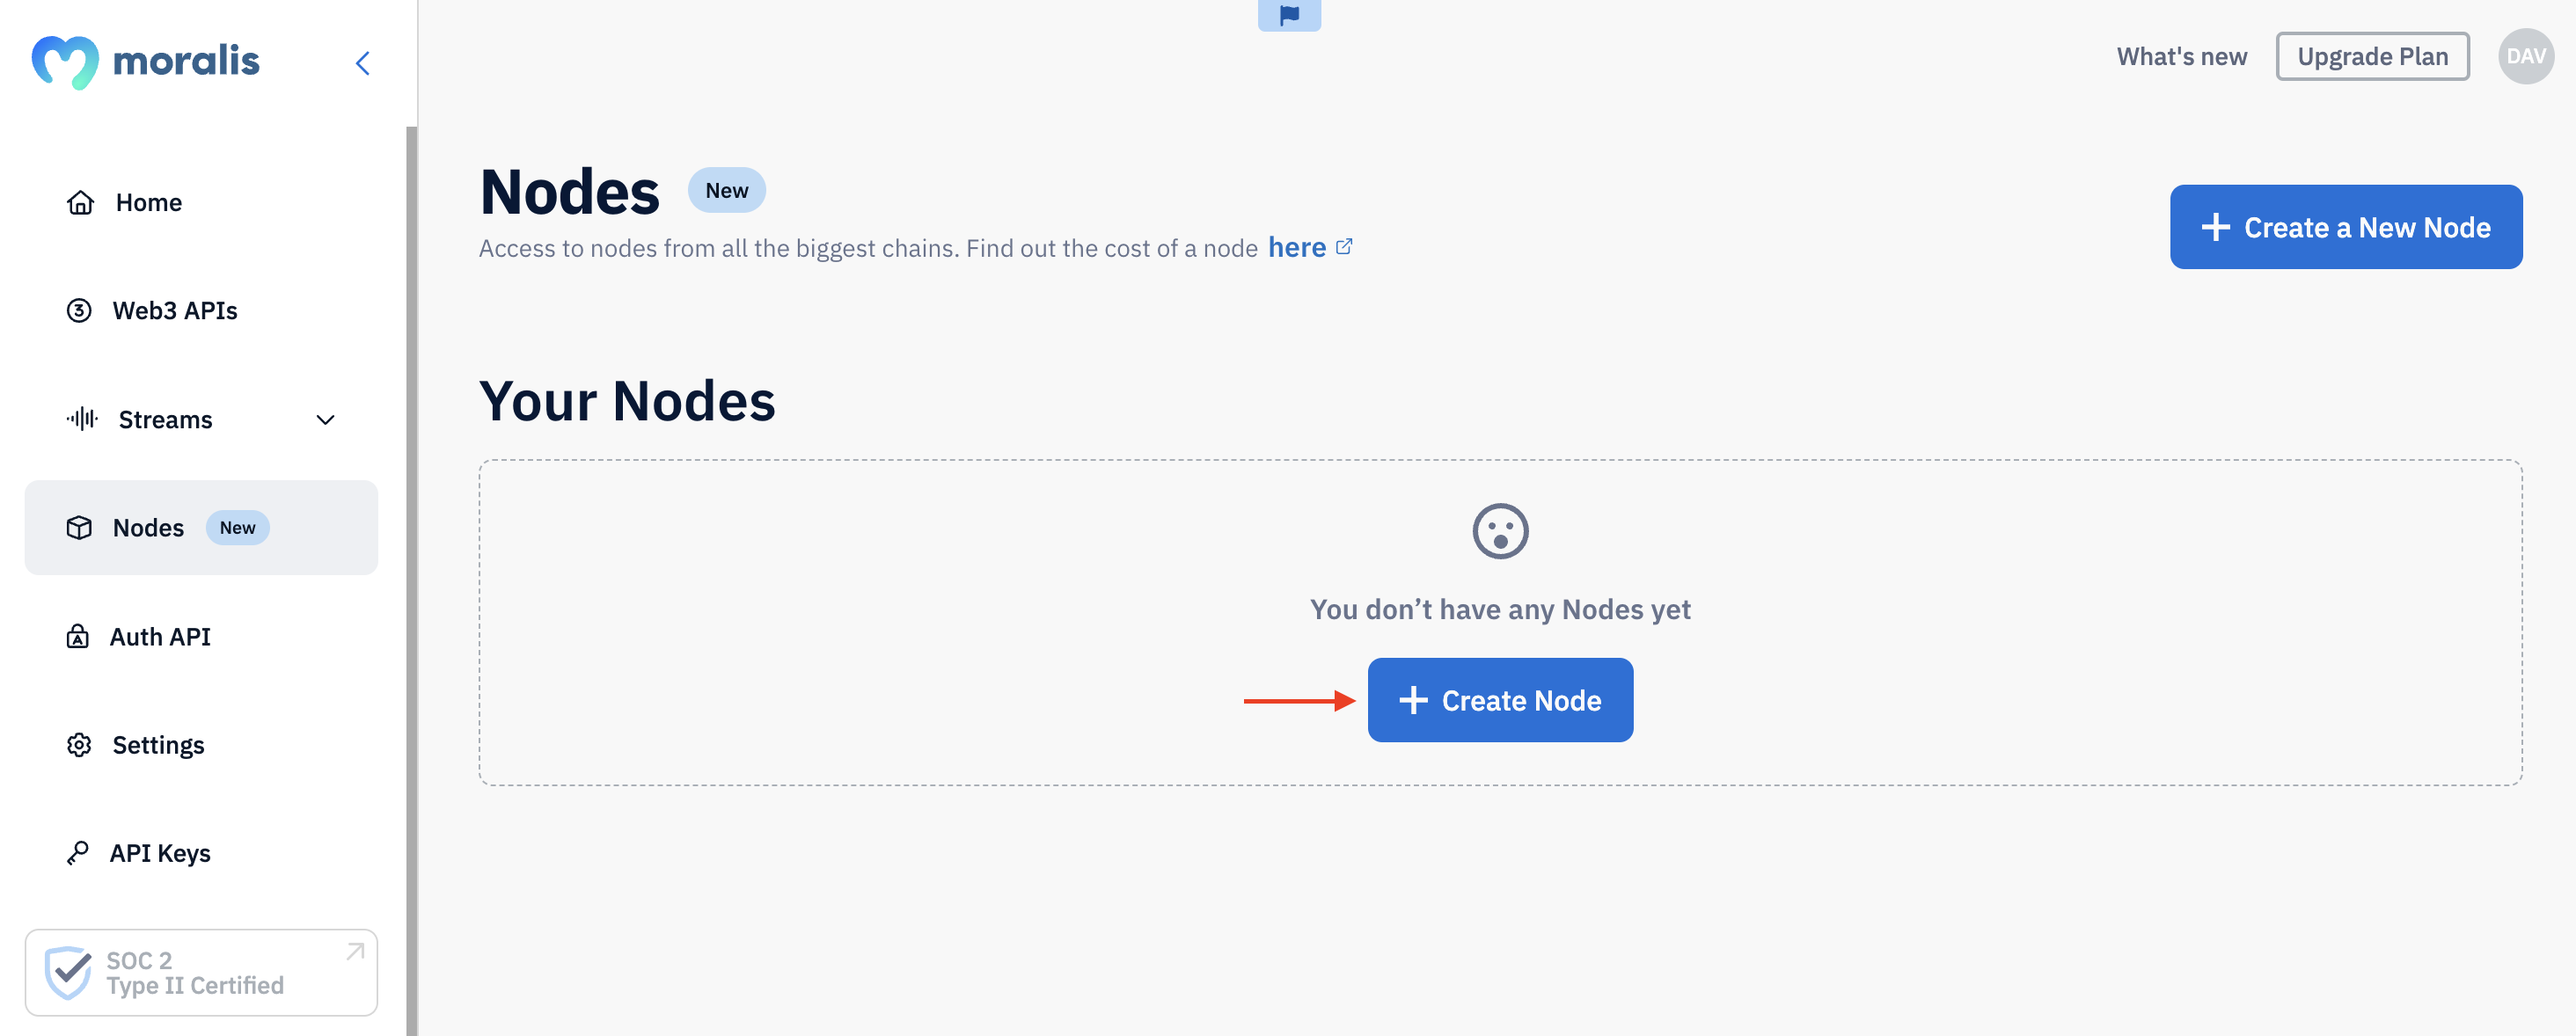
Step 3: Select the Base network, followed by “Mainnet,” and hit ”Create Node”:
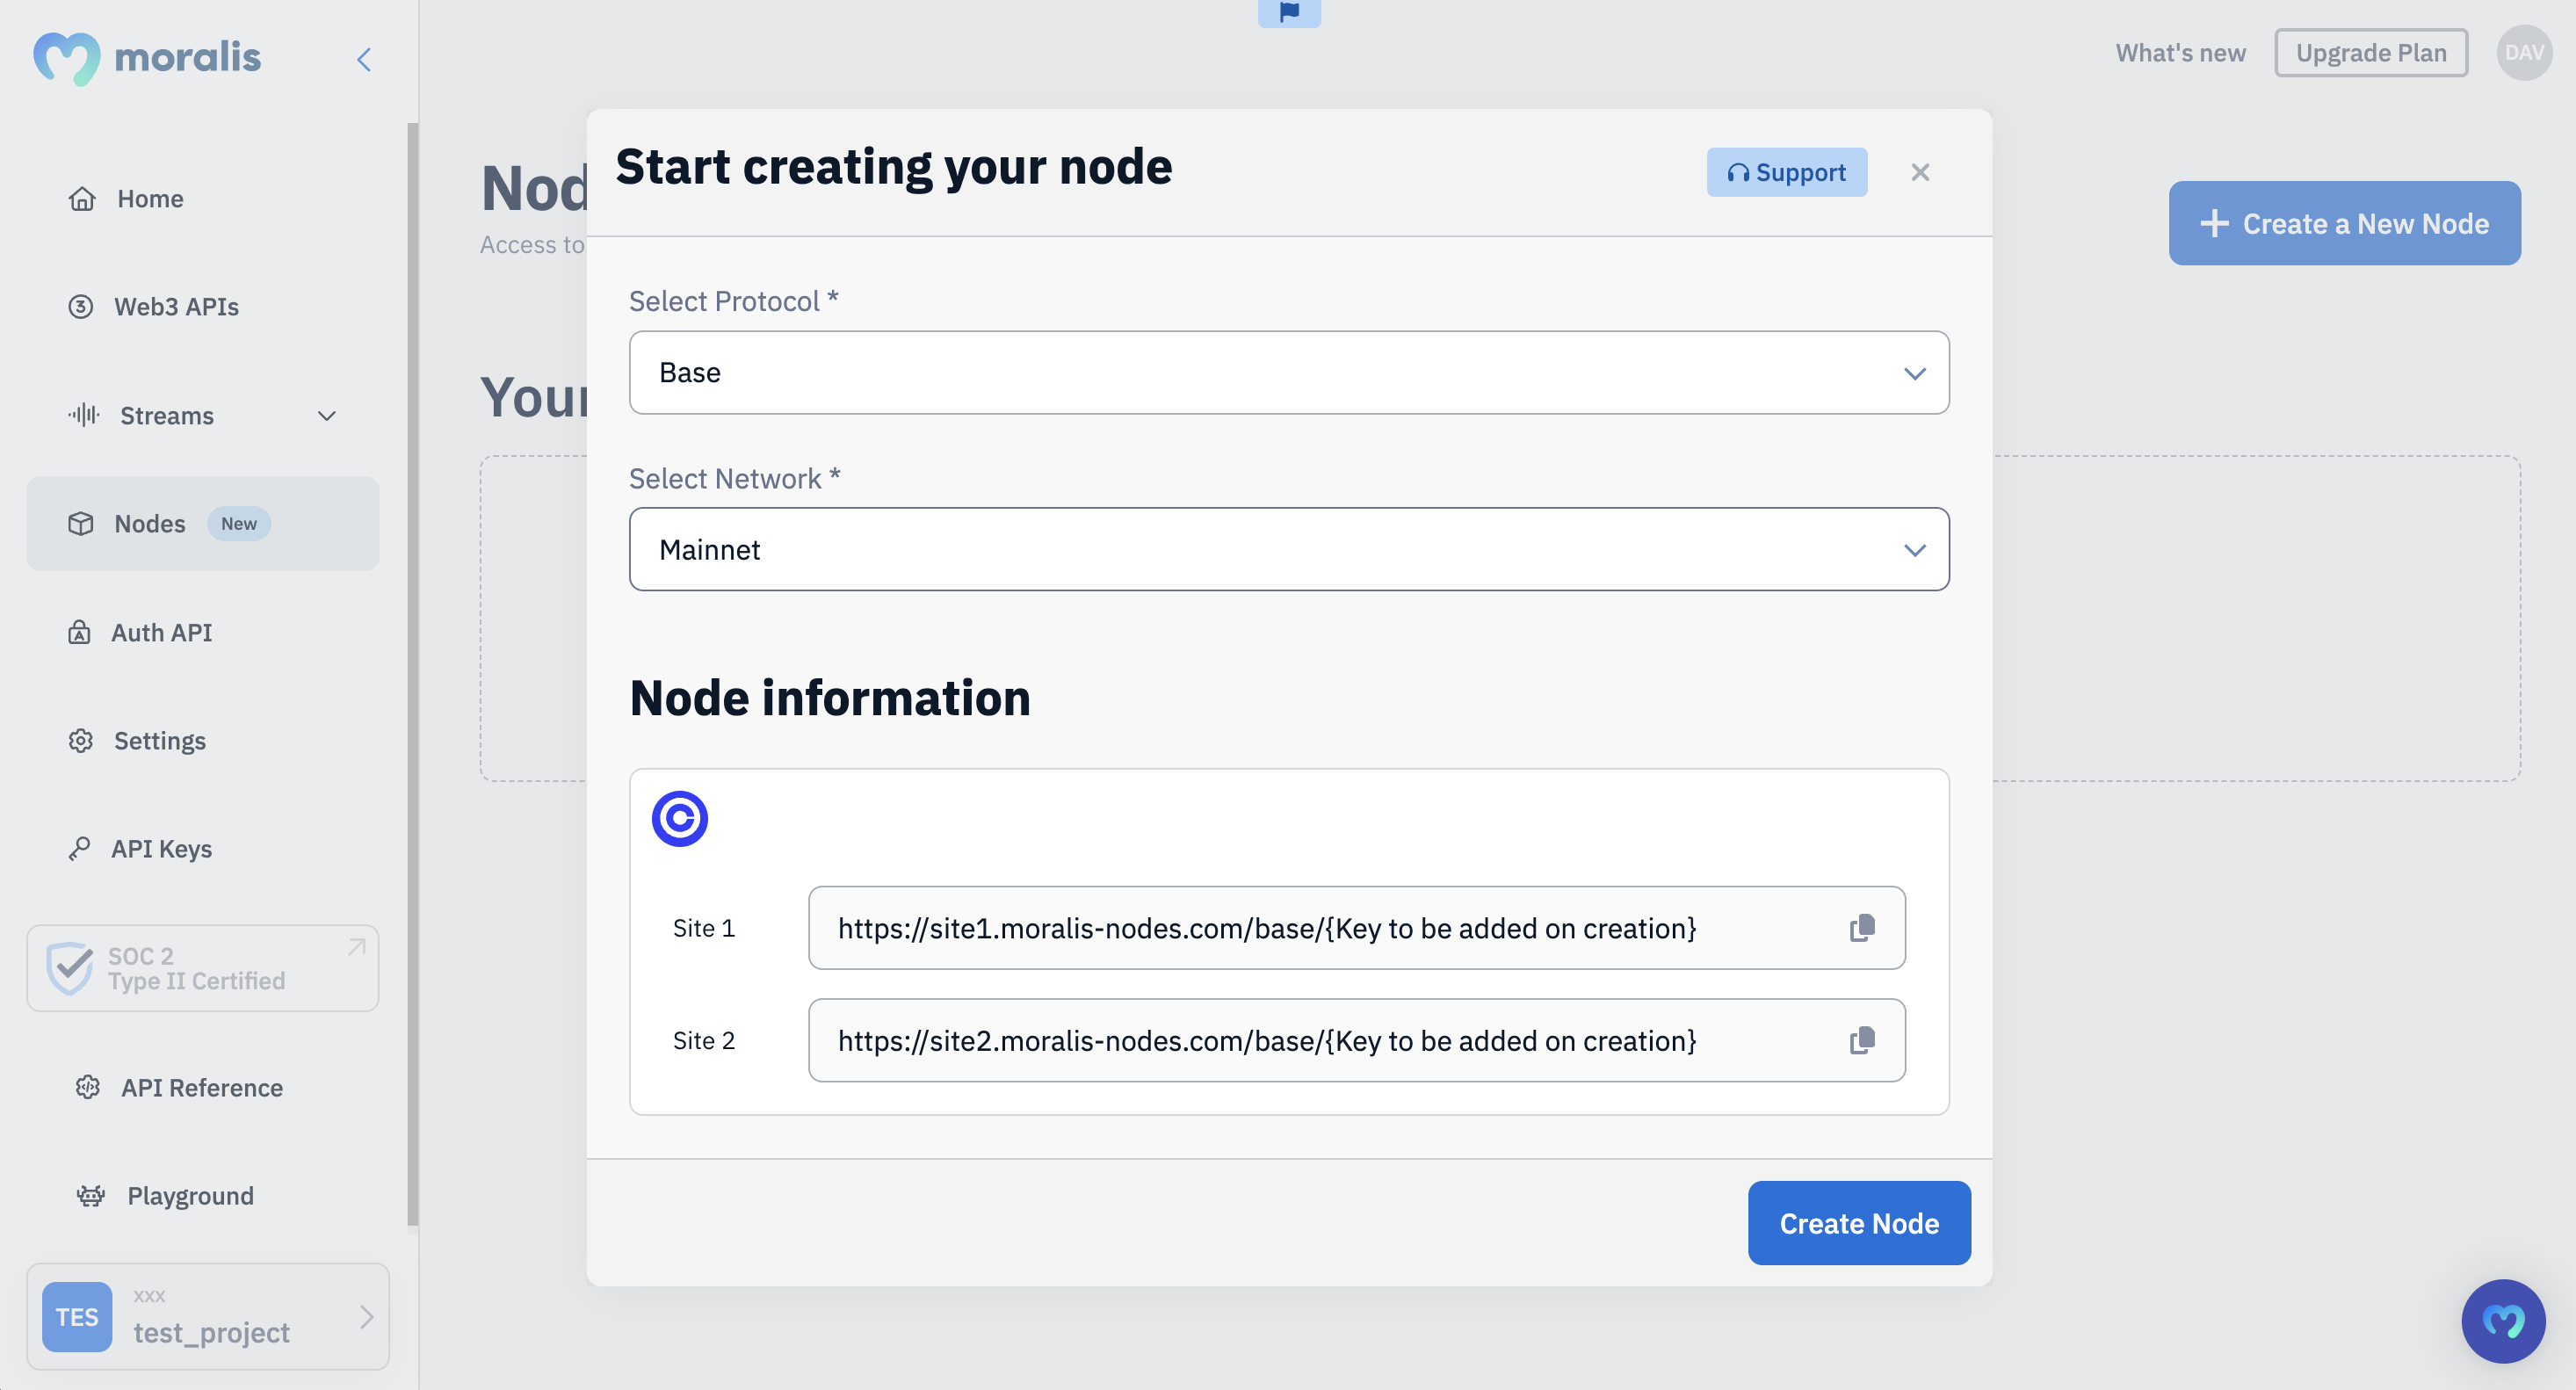
After completing these steps, you’ll receive two URLs that you can use to integrate your Base node seamlessly into your Web3 projects:
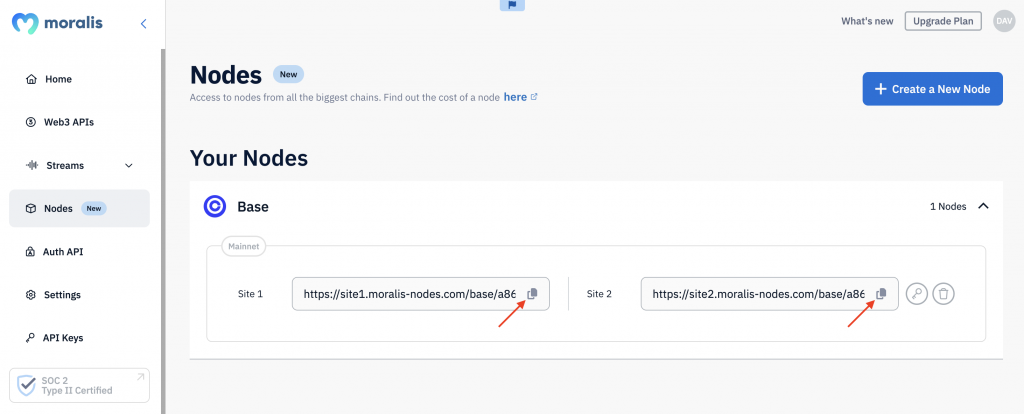
And that’s it! Running Base nodes with Moralis is that simple!
How to Call Your Base Nodes
Now that you know how to run Base nodes, let’s explore how to call them. More specifically, we’ll show you how to fetch the native balance of any wallet using ethers.js!
Before you begin, ensure you have the following installed:
Open your preferred IDE, set up a folder, and initialize a new project using the terminal command below:
npm init
Next, install ethers.js with the following terminal input:
npm install ethers
You can then add “type”: “module” to your ”package.json” file:

Create a new ”index.js” file and add the following snippet:
import { ethers } from “ethers”;
const provider = new ethers.providers.JsonRpcProvider(“YOUR_NODE_URL”);
const address = “0xd8dA6BF26964aF9D7eEd9e03E53415D37aA96045”;
const balance = await provider.getBalance(address);
console.log(“Balance: “, ethers.utils.formatEther(balance));
Now, you need to configure the code slightly. Start by replacing YOUR_NODE_URL with one of your Base node URLs. You also need to change the address parameter to fit your query:

All that remains is executing the script with the terminal command below:
node index.js
In return, you’ll get the native balance of the specified address. Here’s an example of what it might look like:
Balance: 0.077088742255355898
Congratulations! You now know how to make RPC calls to Base nodes!
For a more detailed breakdown and other examples of the types of data you can fetch using Base nodes, check out the Moralis YouTube video below:
Limitations of Base Nodes
While it’s possible to use nodes to interact with the Base network, this approach is not always optimal, especially when reading blockchain data. To elaborate further on this and explain why, let’s explore three limitations of nodes:
Chain Specificity: Nodes are tied to a particular chain, meaning you must run and maintain nodes for each network you interact with. This can quickly become costly if you’re developing cross-chain dapps. Query Complexity: Nodes cannot handle complex queries, such as, “What tokens does wallet X hold?” Obtaining such information requires making multiple requests to various networks and manually consolidating the data. Raw Data: Nodes provide raw blockchain data, which needs to be decoded, interpreted, and formatted before it becomes useful. This additional processing can be time-consuming and complex.

So, how can these limitations be addressed?
The best way to query blockchain data is by using Moralis’ Web3 APIs. Our top-tier interfaces allow you to seamlessly fetch and integrate on-chain data into your dapps with just a few lines of code. To learn more, continue reading as we dive deeper into the advantages of Moralis!
Moralis – Easiest Way to Query On-Chain Data
Moralis is the industry’s leading Web3 infrastructure provider. In our toolkit, you’ll find over ten use case-specific APIs, including the Wallet API, Token API, NFT API, and many others. As such, no matter what Web3 project you’re building, we have your Web3 data needs covered!

But what makes our APIs stand out compared to the competition?
Comprehensive: Our APIs deliver the industry’s most comprehensive responses, providing more data with fewer requests. Access both on- and off-chain data seamlessly with a single call. Cross-Chain: Moralis APIs offer full feature parity across all major chains, including Base, Ethereum, Polygon, and Solana. Say goodbye to the complexity of integrating multiple providers for different chains. Trusted: With over 100,000 developers and major enterprises like MetaMask, Opera, and Blockchain.com relying on our APIs, you can trust Moralis to power your Web3 projects.
Nevertheless, to highlight the power of Moralis further, let’s explore three of our prominent APIs in the following sections!
Wallet API
If you’re building wallets, portfolio trackers, or other platforms that need similar data, then the Wallet API is the tool for you. With Moralis’ Wallet API, you can seamlessly fetch a wallet’s history, balances, net worth, profitability, and much more with only a single API call!
To showcase the capabilities and ease of use of the Wallet API, let’s dive into the Wallet History endpoint:
import fetch from ‘node-fetch’;
const options = {
method: ‘GET’,
headers: {
accept: ‘application/json’,
‘X-API-Key’: ‘YOUR_API_KEY’
},
};
fetch(‘https://deep-index.moralis.io/api/v2.2/wallets/0xd8dA6BF26964aF9D7eEd9e03E53415D37aA96045/history?chain=base&order=DESC’, options)
.then(response => response.json())
.then(response => console.log(response))
.catch(err => console.error(err));
Running the script above will give you a wallet’s full history, complete with automatic category tags, address labels, event summaries, and much more. Here’s an example of what it might look like:
{
//..
“result”: [
{
//…
“erc20_transfers”: [
{
“token_name”: “Vtrading”,
“token_symbol”: “Vtrading”,
“token_logo”: null,
“token_decimals”: “8”,
“from_address”: “0xf29a54d0d79b5143fd125c91ee008a1546e5bbd5”,
“from_address_label”: null,
“to_address”: “0xd8da6bf26964af9d7eed9e03e53415d37aa96045”,
“to_address_label”: null,
“address”: “0x670ada11ca68fbdd66cce29e2d81e953d3348bef”,
“log_index”: 870,
“value”: “897643000000000000”,
“possible_spam”: false,
“verified_contract”: false,
“direction”: “receive”,
“value_formatted”: “8976430000”
}
],
“method_label”: null,
“native_transfers”: [],
“summary”: “Received 8,976,430,000 Vtrading from 0xf2…bbd5”,
“possible_spam”: false,
“category”: “token receive”
},
]
}
With this information, you can seamlessly build a crypto wallet timeline without breaking a sweat!
Token API
The Token API is your go-to interface for ERC20 data. This tool allows you to effortlessly retrieve token balances, metadata, owners, prices, and much more. It’s the ideal solution for developing DEXs, token explorers, and any platform that requires comprehensive ERC20 data!
To highlight the accessibility of the Token API, let’s explore our Token Balances with Prices endpoint:
import fetch from ‘node-fetch’;
const options = {
method: ‘GET’,
headers: {
accept: ‘application/json’,
‘X-API-Key’: ‘YOUR_API_KEY’
},
};
fetch(‘https://deep-index.moralis.io/api/v2.2/wallets/0xd8dA6BF26964aF9D7eEd9e03E53415D37aA96045/tokens?chain=base’, options)
.then(response => response.json())
.then(response => console.log(response))
.catch(err => console.error(err));
Calling the endpoint above will give you the specified wallet’s token balances with prices and other metadata. Here’s an example of what it might look like:
{
//…
“result”: [
{
“token_address”: “0x4ed4e862860bed51a9570b96d89af5e1b0efefed”,
“symbol”: “DEGEN”,
“name”: “Degen”,
“logo”: “https://logo.moralis.io/0x2105_0x4ed4e862860bed51a9570b96d89af5e1b0efefed_42f4c140b5aa439786af1f0732aa84cb”,
“thumbnail”: “https://logo.moralis.io/0x2105_0x4ed4e862860bed51a9570b96d89af5e1b0efefed_42f4c140b5aa439786af1f0732aa84cb”,
“decimals”: 18,
“balance”: “15301405839856832872366597”,
“possible_spam”: false,
“verified_contract”: false,
“total_supply”: “36965730332999999999826460672”,
“total_supply_formatted”: “36965730332.999999999826460672”,
“percentage_relative_to_total_supply”: 0.04139348986755168,
“balance_formatted”: “15301405.839856832872366597”,
“usd_price”: 0.023628680810304583,
“usd_price_24hr_percent_change”: -4.5322572211347945,
“usd_price_24hr_usd_change”: -0.0011217533389937875,
“usd_value”: 361552.03453890764,
“usd_value_24hr_usd_change”: -17164.403092158434,
“native_token”: false,
“portfolio_percentage”: 93.5407
},
//…
]
}
With this information, you can effortlessly build a portfolio view of any wallet with just one single endpoint!
NFT API
If you’re looking to build NFT marketplaces, Web3 games, or other NFT projects, then you’ll definitely want to check out Moralis’ NFT API. With this premier tool, you can effortlessly fetch NFT balances, metadata, prices, images, and much more!
To showcase the ease of use of the NFT API, let’s explore our NFT Balance endpoint in action:
import fetch from ‘node-fetch’;
const options = {
method: ‘GET’,
headers: {
accept: ‘application/json’,
‘X-API-Key’: ‘YOUR_API_KEY’
},
};
fetch(‘https://deep-index.moralis.io/api/v2.2/0xd8dA6BF26964aF9D7eEd9e03E53415D37aA96045/nft?chain=base&format=decimal&media_items=false’, options)
.then(response => response.json())
.then(response => console.log(response))
.catch(err => console.error(err));
In return for calling the endpoint above, you’ll get the NFT balance of the wallet in question. Here’s an example of what it might look like:
{
//…
“result”: [
{
“amount”: “1”,
“token_id”: “1”,
“token_address”: “0x0171b64518477b66e4f7069a66585eac513d1d9a”,
“contract_type”: “ERC721”,
“owner_of”: “0xd8da6bf26964af9d7eed9e03e53415d37aa96045”,
“last_metadata_sync”: “2024-05-28T13:26:28.029Z”,
“last_token_uri_sync”: “2024-05-28T13:26:28.029Z”,
“metadata”: “{\”name\”:\”RIVER 1/777\”,\”description\”:\”RIVER \”,\”image\”:\”ipfs://bafybeidmhk4zyqmkpiws3rv2ytpqwv4lo4rsur3iiv4sxm2me5b64hmwh4\”,\”properties\”:{\”number\”:1,\”name\”:\”RIVER\”}}”,
“block_number”: “4717448”,
“block_number_minted”: null,
“name”: “RIVER”,
“symbol”: “$RVR”,
“token_hash”: “390b06a41add82f6dd02f3a60ae4c448”,
“token_uri”: “Invalid uri”,
“minter_address”: null,
“verified_collection”: false,
“possible_spam”: false,
“collection_logo”: “https://i.seadn.io/s/raw/files/1d05ee5e891f8573547738cc1e2e6fdb.png?w=500&auto=format”,
“collection_banner_image”: “”
},
]
}
For more details on these interfaces and our full suite of tools, visit our official Web3 API page!
Summary: Base Nodes – How to Run an RPC Node on Base
Setting up and running Base nodes from scratch can be time-consuming and complex, requiring a robust underlying infrastructure. Additionally, since nodes are chain-specific, you need to run a new one for each network you interact with. This can quickly become costly if you’re building cross-chain dapps. Fortunately, you can avoid these issues with a node provider like Moralis!
At Moralis, we handle all the complexities for you, streamlining the process of running nodes. You can set up your own Base nodes with just a few clicks. Here’s how:
Step 1: Register a free account with Moralis.Step 2: Log in, go to the “Nodes” tab, click “+ Create Node”, and set up your Base node:
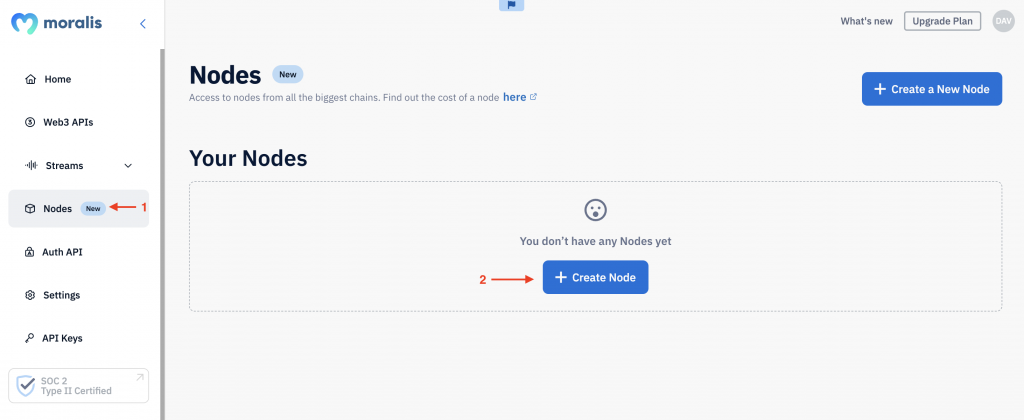
Step 3: Copy and integrate one of your node URLs into your project:
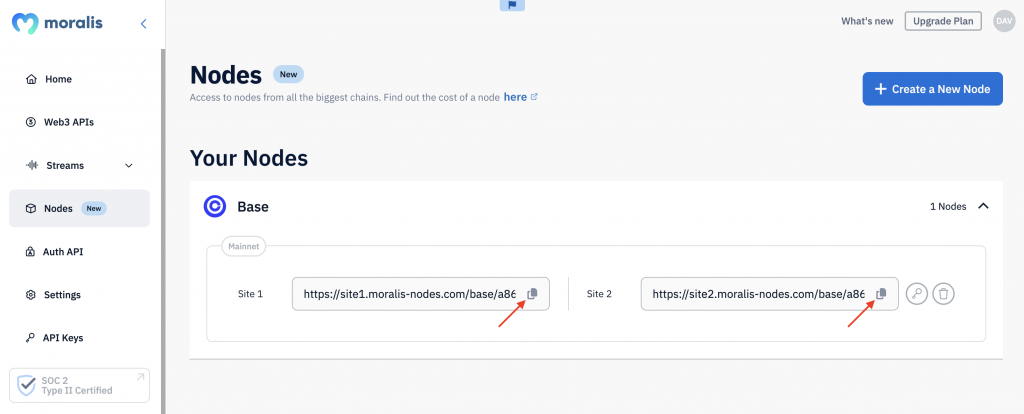
That’s it! Setting up Base nodes is simple with Moralis!
However, if you’re looking to query and integrate data into your dapps, our API suite is the perfect solution. With top-tier interfaces like the Token API, Wallet API, NFT API, and more, you can seamlessly streamline on-chain data integration for your dapps with single lines of code.
If you found this guide helpful, explore more content on Moralis. Check out our Linea nodes guide or learn how to run Ethereum nodes with ease.
Ready to set up your own Base nodes? Sign up with Moralis for free and gain instant access to our premier node service!


